Easy Caprese Salad Recipe
23 hours ago
 The inside was kinda fun. It is an accordian fold and I added a couple elements to the folds that stuck out. Simple and fun, just what my hubby needs. He brought me breakfast in bed this morning. What a sweety.
 I hope you've enjoyed two weeks worth of Valentine Cards, that will hopefully give you some inspiration of fun techniques to add to your own cards. Tomorrow I will share the Valentine that I made for my hubby this year.
  Fun techniques and tools can really add a little something extra to your cards.
 I know some of you may be thinking, my husband won't really like a card, but my hubby has kept every one I've ever given him. He has them stashed in his dresser with his other "treasures".
 I think these cards are pretty self explanatory as to how I made them. On the love card I used an edge distessor to rough up the edges and I had the polka dot patterned paper in stock and I added the hearts to it with my stamps. It's an easy way to spruce up some basic paper. I used a glue pen and superfine glitter to add the red sparkle to the heart on the other card.
 Top View
 She isn't the most excited person when having her photo taken. She's always making crazy faces, so this is her "just hold still" face.
  Side View
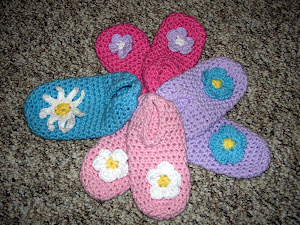
 I was sick yesterday so as I was laying on the couch I made two of these to go in the girls hair for church. I attached it to one of those small goody snap clips. (Not sure what the correct name is lol) These are quick and so easy to make, and it uses up any leftover scrap yarn you may have lying around.
  A little tip - I took the pieces of thread that were hanging over the paper and taped them to the back, that way nothing will come unraveled as I didn't do any backstitching.
  I think this Valentine is just so sweet, don't you think??
 I know my hubby wouldn't be disappointed with this Valentine. I hope your would like it too.
 Shaker boxes are so fun to make and add a little something special to your card.

 I hope you like todays card. Check back tomorrow for another V-Day card
 Erase your heart guide with a white eraser. Then I started with one style of eyelets at a time. I made the holes for the stars and then set them. Then I made the holes for the flowers and set them, and so on.
 Now I have all my eyelets set in the exact place that I wanted them to be.
 Here is my finished card. I feathered the edges with some red ink and a sponge. Added some ribbon, and some rub-ons for the sentiment and accent. There you have it, a cute eyelet heart card worthy of much praise from the recipient.
  I am going to be posting a card a day counting down to Valentine's Day. I hope it will give you some inspiration for your own Valentine cards. So check back each day to see the new card.