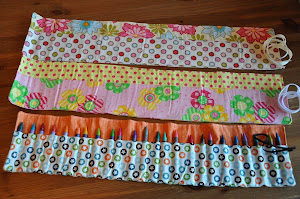
My old checkbook cover was starting to get some tears at the fold. I had seen some of these on the web and figured they really couldn't be that hard to make. So I measured out my old checkbook cover and figured out how I needed to put it together. This is what I ended up with, cute eh!
Then I decided that I needed to make a matching tissue cover using this tutorial. So easy let me tell you, and how much prettier does this look compared to a regular package of tissues.
Wednesday, January 28, 2009
Monday, January 26, 2009
V-Day is coming
I don't always decorate my house for every little holiday that comes up. Now the reasoning behind this is that first I have little kids and keeping their little fingers off my decorations is a tough thing to do. There is a part of me deep down that has "Martha" screaming to be let out. I had to figure out a way to allow my creativity to come out in a fashion that didn't cause me a lot of stress if little fingers were to get ahold of my creations. So today I have a simple decoration to share with you that won't have you leaping off your chair when your toddler crawls up on the table with that mischievous grin on his face, eyes aglow as he reaches for your centerpiece.
Felt stuffed hearts, not really that spectacular I know.......BUT if I were to make something spectacular, i'm sure I wouldn't want the kids to touch it. These are so easy to make, anyone could do it. I cut out two pieces of felt using a cardboard template. Then using embroidery floss I stitched the edges together, pausing when there is an inch opening left to stitch. Stuff them with some fiberfill and finish stitching it closed. These are cute, and fun and could be used many ways to decorate with. You could string them up together like a banner, hang them from some ribbon in random places in your home, the possibilities are endless. There's still time for you to make some......I would love to see what you come up with and how you choose to decorate with them.
Wednesday, January 21, 2009
Thinking of You
I had a lady call me the other day looking for a vase stamp, so that led me to making this card with some springy (springish? springlike?) Oh well you get what I mean. I'm looking forward to spring, I'm kinda sick of winter and there's still a couple months to go. I stamped the flowers twice on White Daisy CS and cut them out. The vase is stamped, cut out and pop dotted on. I wanted the flowers to have dimension so I layered them & curled the petals up a little.
Here's a close up shot of the flowers. Looking at this picture now, I see that I took it before I added little sparkles to the centers of the flowers. LOL I'm a deep rooted blonde, I guess. So just imagine cute little sparkles in the centers of the flowers. There you go....I think this would make a nice little pick me up for one of these soon to be colder dreary winter days.
Have a daisy of a day. :)
Sunday, January 18, 2009
Newborn Baby Kits
I've been working on making some newborn baby kits, that are being sent down to Peru (I think) They are going to be given to the women when they have a baby so they have the basic necessities that they will need for their newborns. My mother in law got the sleepers, socks and soap. I put together the cloth diapers, onesies, diaper pins, and made some of the items. This brings me to what I want to share with you. I made this flannel blanket, burp cloth, and bib. I just used a burp cloth and bib I had to make my pattern. They were really easy to do. I have a boy themed one to make for the second kit, it has little animals on it.
I got to play around with cool stitch functions on my sewing machine and chose this one to topstitch with. It's like a wavy vine with leaves, so cute.
And.....I can't help but share....check out the new flooring in my craft room. My hubby and I put it down on Saturday. Took about 5 hours to do, that includes clearing out the room and putting on the baseboard. I love it. Now I just need to stay perfectly organized so it doesn't get cluttered again. Notice I didn't include the desktop in the picture!!!!! Yea, that's cuz it's covered with stuff. I am on a mission to organize, because I feel way more inspired when things are nice and neat.
Thursday, January 15, 2009
Snuggle Pod
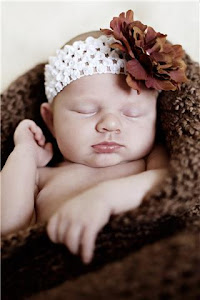
I am going to be custom making these adorable little snuggle pods for those that may want one. They make a wonderful baby shower gift also. I make them with a super soft textured yarn that will surround your little bundle in warmth. I made this one for my nephew who is my cute little model. Most infants love to be snuggled up and this snuggle pod combined with the hat does just that. Send me an email, if you would like to order one. I am selling them at $30 for the set.
Here are the colors that I have on hand to choose from. If you have questions, don't hesitate to ask. They show a tad darker than actual life, number 11 is a really dark eggplant purple, but the rest are what you see.
Simple Bow Holder
I made this really simple bow holder the other day. I've seen really cute bow holder boards where they put material and ribbons on a board so you can have tons of bows organized. I wanted to do that, but in an effort to thwart my perfectionism, I decided to make something simple and easy for right now. My girls don't have a ton of bows 'yet', oh yea they need hair first before they can have tons of bows. That is another story all in it's own. Anyways.......to make this I took a 2 inch wide piece of organdy ribbon that i've been moving around on my desk forever, because i'm gonna use it for something, someday. Wow I'm revealing a lot of character flaws today...yes packrat is one of them. Back to the directions, I double folded the bottom, tried a new fun stitch on my sewing machine, and sewed it up. I then attached a photo hanger (CTMH out of my scrapbook stash) to the top of the ribbon, folding it and putting the brad through the ribbon so it is secure. Tied some pink ribbon (yet another piece that has been floating around) to the top to finish it off nicely and yer done. Add your bows, clips, and what-nots. I hung it with a push pin on their wall and now they can't tell me they don't know where such-and-such bow is.
Just a side note - I had to delete this post and re-post it because some person posted a spam comment. Lame, eh!! So from now on I guess I will have to approve comments before they get posted. Don't people have better things to do with their time, I mean really.
Monday, January 12, 2009
Crocheted Cuteness
About a year ago I bought a book.... Amigurumi World. Seriously Cute Crochet I am finally getting around to making some of the items out of that book.
This cute little egg shell pattern is in the book and she has a little chick that you can crochet to go inside. The egg pattern I got from here I folded it up and stuffed it in the shell. My kids have been playing with this a ton. My daughter asked me if I was going to make a whole set of 12.....hmmmmm, we'll see about that lol. Eventually i'm sure I can make a whole set some with chicks inside some with little fried eggs.
This little cuppycake is a pattern out of the book as well. I love it. I made it to hold my sewing pins, because the little tomato one I had just didn't work that well (you know the one, i'm sure all those who sew have had one of these) This one works much better and it's ten times as cute.
I am having so much fun with these little projects, they are cute and don't take a lot of time to complete. I'm sure you will be seeing much more of these in the future.
Friday, January 9, 2009
A New Year....A New Chapter
As 2008 is now behind us and 2009 is just beginning, a new chapter has emerged in my life. Over the past about 4 months I have really grown and learned so many new things. I wanted to share them all with you, but my blog Ink and Paper was mostly dedicated to papercrafts, and my family blog is private, leaving me with no logical place to share these fun creations. So I've decided to start a new blog where I can combine things and simplify my life a little. I have been researching selling some of my creations online as well, but for now this blog will also serve that purpose. I will post pictures of the items i'm selling on the sidebar, and will do custom orders for now until I can get a website up and running. I'm excited to take a new step, and a little hesitant at the same time. I will continue to post the paper creations I make on here and the labels will help to sort my creations making it easier to find inspiration. I hope you will join me on this crazy journey, it's bound to be a fun ride.
Subscribe to:
Posts (Atom)